
You asked, so we provided—easy-to-follow instructions on how to set up your electronic devices to write in Norwegian! We’ll also give you a few excellent tips on how to use this keyboard, as well as some online and app alternatives if you prefer not to set up a Norwegian keyboard.
 Table of Contents
- Why it’s Important to Learn to Type in Norwegian
- Setting up Your Computer and Mobile Devices for Norwegian
- How to Activate an Onscreen Keyboard on Your Computer
- How to Change the Language Settings to Norwegian on Your Computer
- Activating the Norwegian Keyboard on Your Mobile Phone and Tablet
- Norwegian Keyboard Typing Tips
- How to Practice Typing Norwegian
1. Why it’s Important to Learn to Type in Norwegian

Learning a new language is made so much easier when you’re able to read and write/type it. This way, you will:
- Get the most out of any dictionary and Norwegian language apps on your devices
- Expand your ability to find Norwegian websites and use the various search engines
- Be able to communicate much better online with your Norwegian teachers and friends, and look super cool in the process!
2. Setting up Your Computer and Mobile Devices for Norwegian
It takes only a few steps to set up any of your devices to read and type in Norwegian. It’s super-easy on your mobile phone and tablet, and a simple process on your computer.
On your computer, you’ll first activate the onscreen keyboard to work with. You’ll only be using your mouse or touchpad/pointer for this keyboard. Then, you’ll need to change the language setting to Norwegian, so all text will appear in Norwegian. You could also opt to use online keyboards instead. Read on for the links!
On your mobile devices, it’s even easier—you only have to change the keyboard. We also provide a few alternatives in the form of online keyboards and downloadable apps.
3. How to Activate an Onscreen Keyboard on Your Computer
1- Mac
1. Go to System Preferences > Keyboard.
2. Check the option “Show Keyboard & Character Viewers in Menu Bar.”
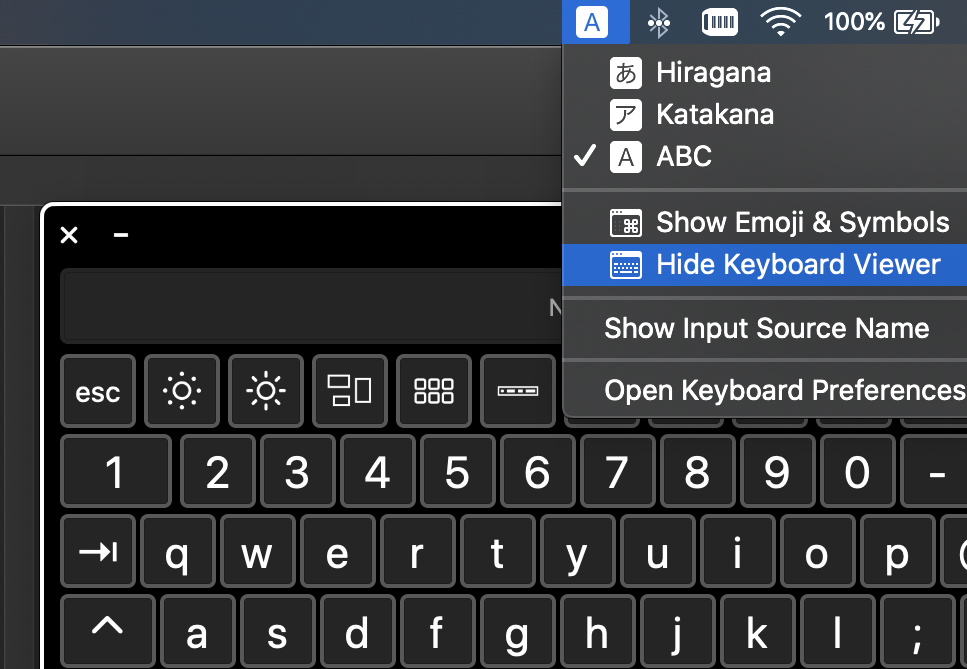
3. You’ll see a new icon on the right side of the main bar; click on it and select “Show Keyboard Viewer.”
2- Windows
1. Go to Start > Settings > Easy Access > Keyboard.
2. Turn on the option for “Onscreen Keyboard.”
3- Online Keyboards
If you don’t want to activate your computer’s onscreen keyboard, you also have the option to use online keyboards. Here are some good options:
4- Add-ons of Extensions for Browsers
Instead of an online keyboard, you could also choose to download a Google extension to your browser for a language input tool. The Google Input Tools extension allows users to use input tools in Chrome web pages, for example.
4. How to Change the Language Settings to Norwegian on Your Computer

Now that you’re all set to work with an onscreen keyboard on your computer, it’s time to download the Norwegian language pack for your operating system of choice:
- Windows 8 (and higher)
- Windows 7
- Mac (OS X and higher)
1- Windows 8 (and higher)
- Go to “Settings” > “Change PC Settings” > “Time & Language” > “Region & Language.”
- Click on “Add a Language” and select “Norwegian.” This will add it to your list of languages. It will appear as Norsk with the note “language pack available.”
- Click on “Norsk” > “Options” > “Download.” It’ll take a few minutes to download and install the language pack.
- As a keyboard layout, you’ll only need the one marked as “Norwegian – Norsk.” You can ignore other keyboard layouts.
2- Windows 7
1. Go to Start > Control Panel > Clock, Language, and Region.
2. On the “Region and Language” option, click on “Change Keyboards or Other Input Methods.”
3. On the “Keyboards and Languages” tab, click on “Change Keyboards” > “Add” > “Norsk.”
4. Expand the option of “Norwegian” and then expand the option “Keyboard.” Select the keyboard layout marked as “Norwegian.” You can ignore other keyboard layouts. Click “OK” and then “Apply.”
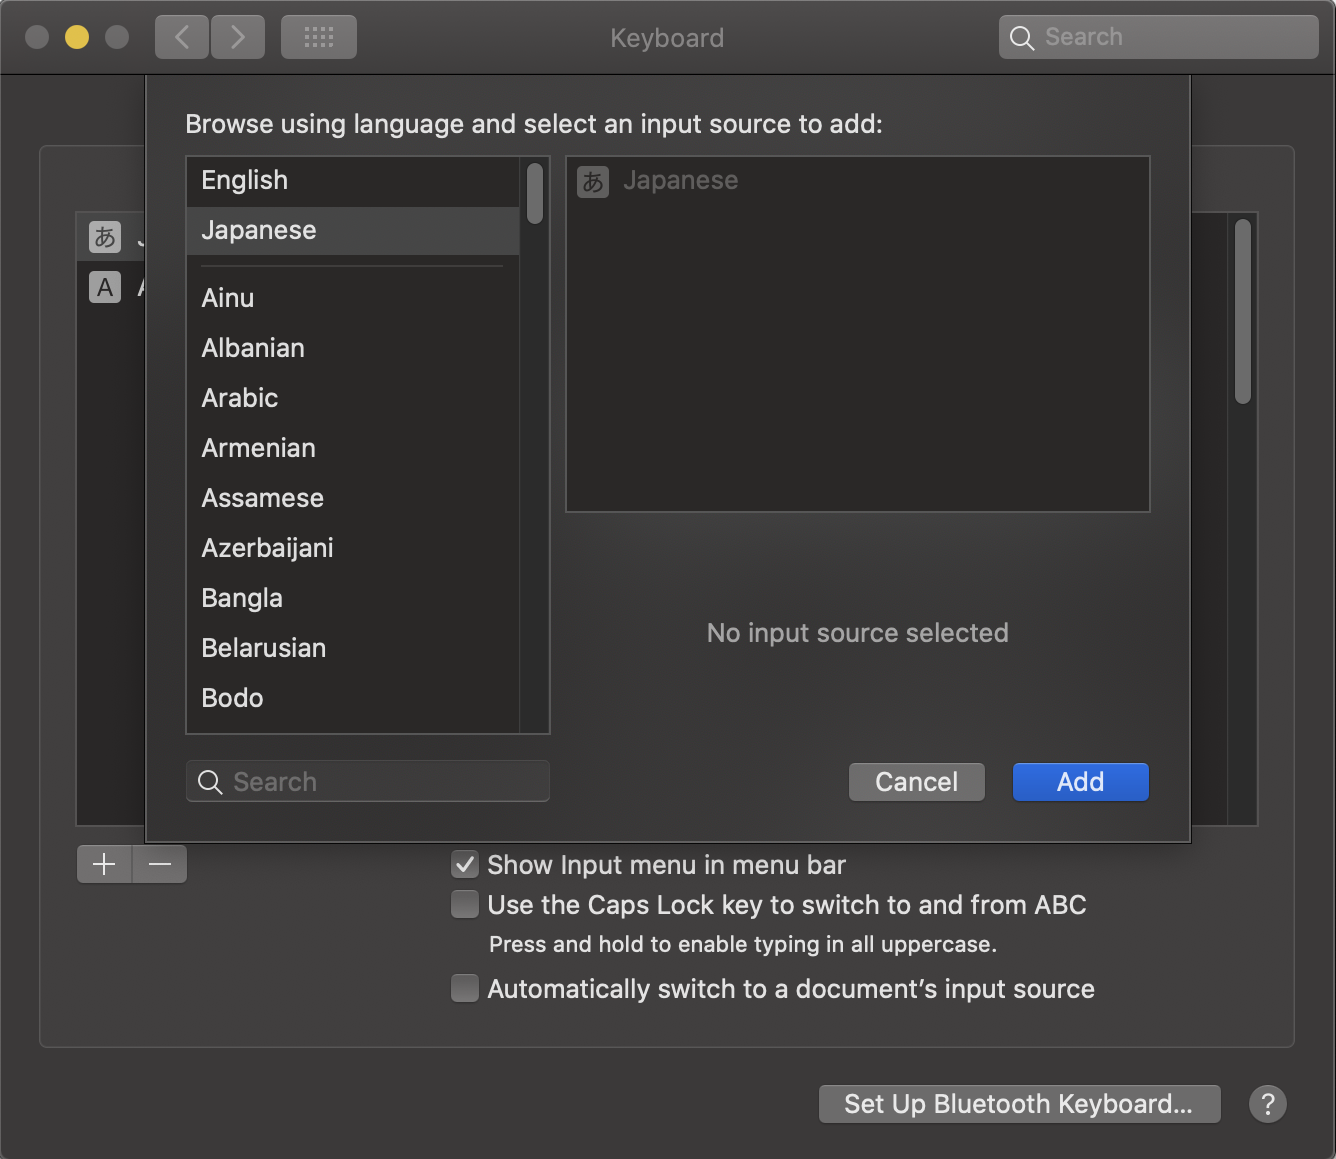
3- Mac (OS X and higher)
If you can’t see the language listed, please make sure to select the right option from System Preferences > Language and Region
1. From the Apple Menu (top left corner of the screen) go to System Preferences > Keyboard.
2. Click the Input Sources tab and a list of available keyboards and input methods will appear.
3. Click on the plus button, select “Norwegian Bokmål,” and add the “Norwegian” keyboard.
5. Activating the Norwegian Keyboard on Your Mobile Phone and Tablet
Texting and searching in Norwegian will greatly help you master the language! Adding a Norwegian keyboard on your mobile phone and/or tablet is super-easy.
You could also opt to download an app instead of adding a keyboard. Read on for our suggestions.
Below are the instructions for both iOS and Android mobile phones and tablets.
1- iOS
1. Go to Settings > General > Keyboard.
2. Tap “Keyboards” and then “Add New Keyboard.”
3. Select “Norwegian” from the list.
4. When typing, you can switch between languages by tapping and holding on the icon to reveal the keyboard language menu.
2- Android
1. Go to Settings > General Management > Language and Input > On-screen Keyboard (or “Virtual Keyboard” on some devices) > Samsung Keyboard.
2. Tap “Language and Types” or “ + Select Input Languages” depending on the device and then “MANAGE INPUT LANGUAGES” if available.
3. Select “Norsk” from the list.
4. When typing, you can switch between languages by swiping the space bar.
3- Applications for Mobile Phones
If you don’t want to add a keyboard on your mobile phone or tablet, this is a good app to consider:
6. Norwegian Keyboard Typing Tips
Typing in Norwegian can be very challenging at first! Therefore, we added here a few useful tips to make it easier to use your Norwegian keyboard.

- If you don’t have access to a virtual keyboard, the unique Norwegian letters can be written as: Æ = AE, Ø = OE, and Å = AA. This works irrespective of device, and all native Norwegian speakers will understand the substitutes.
- If you’ve installed a Norwegian keyboard instead, you can find Å next to the P key, Ø next to the L key, and Æ between the Ø and @ keys.
7. How to Practice Typing Norwegian
As you probably know by now, learning Norwegian is all about practice, practice, and more practice! Strengthen your Norwegian typing skills by writing comments on any of our lesson pages, and our teacher will answer. If you’re a NorwegianClass101 Premium PLUS member, you can directly text our teacher via the My Teacher app—use your Norwegian keyboard to do this!


